Showing posts with label porch. Show all posts

July 1, 2016

Queen Anne Gets a Paint Job, Part 3

The south side. Some people hear that and think of big cities like Chicago. In this case, we are talking about the south-facing side of our 1902 Queen Anne Victorian.

The south side of our home has had some issues. A floating corner that was having a hard time staying afloat. A leaky roof. A dilapidated porch. A weird fire escape??

A while back, our home was a multi-family home, and the second and third floors were used as a boarding house. We're not sure what the municipal code required, but we can only assume that it was during this time that a fire escape was added off the third floor. It was certainly an ugly thing.

The fire escape is visible in the upper left.

Another view of the fire escape.

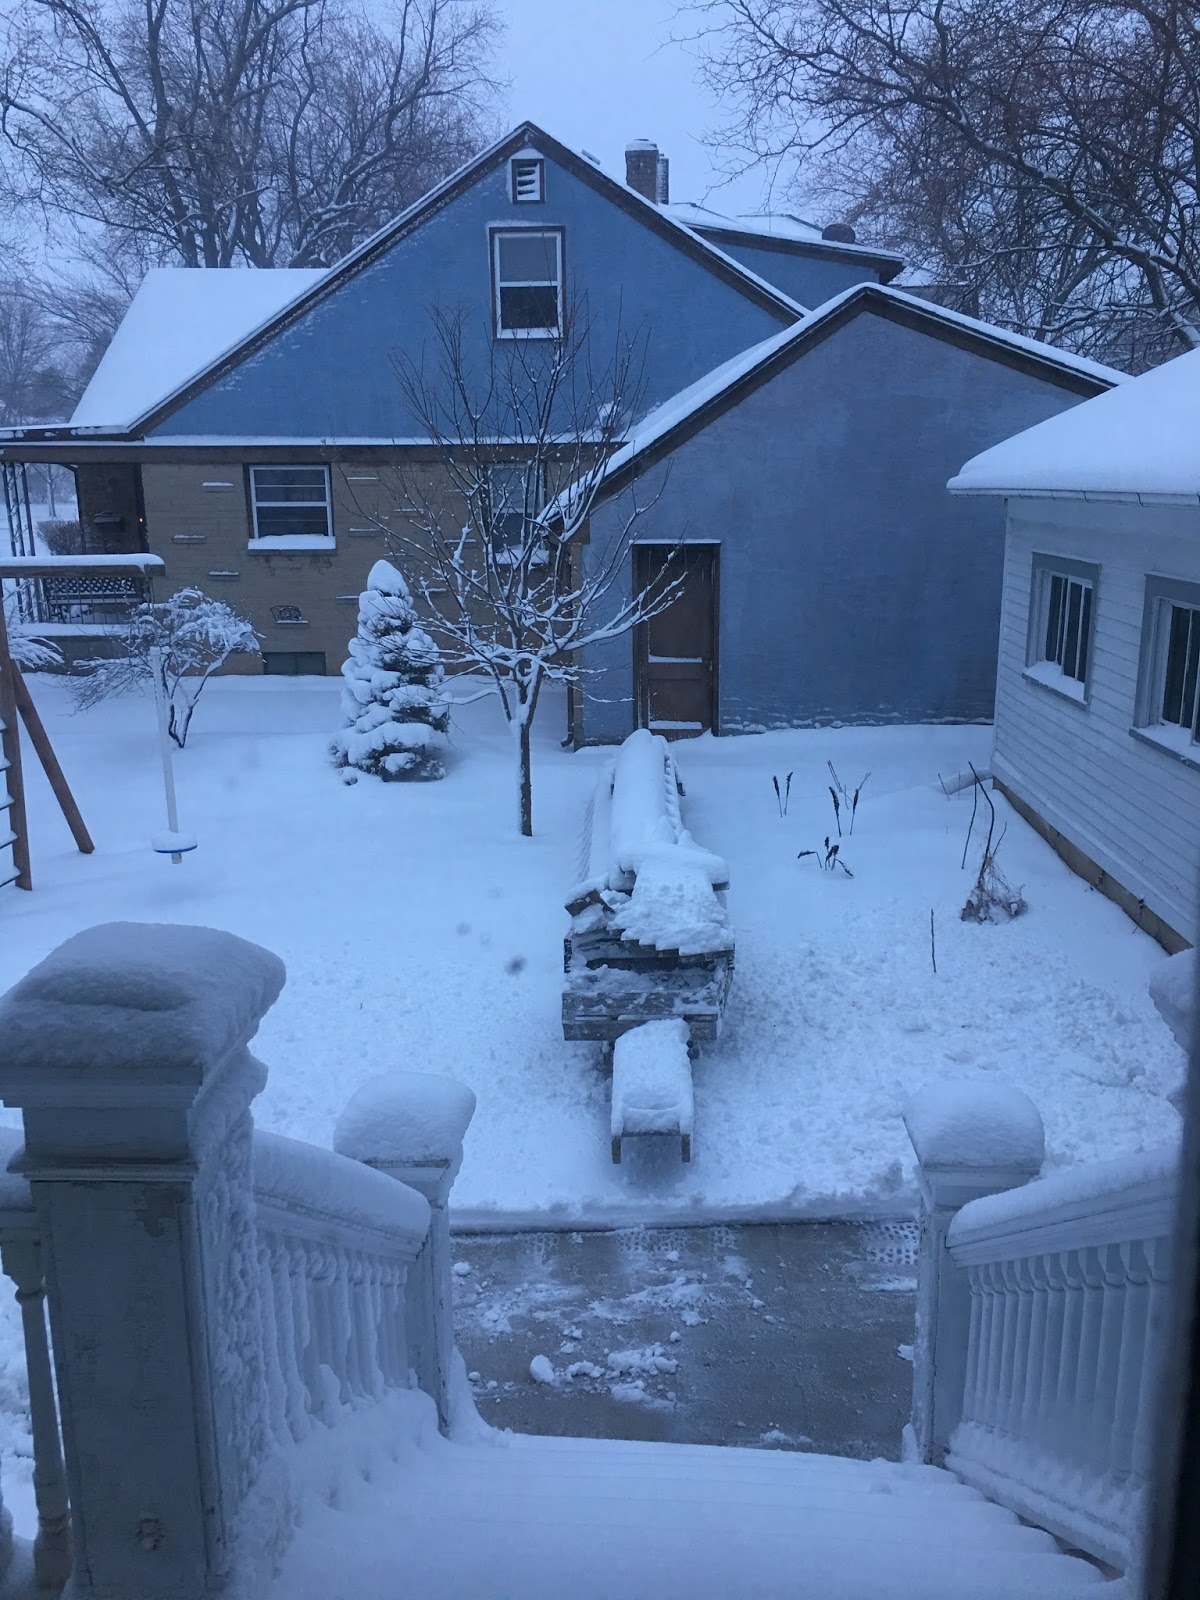
When Karstin and Alex finished up on the north and east sides of the house, they moved on to the south. They were able to get two days' work done before this happened:

Spring in Wisconsin. Go figure.

We had to wait a bit for the snow to melt and for the ground to dry up a little bit, and the scraping was underway!


Notice how the fire escape is gone. Yay!

Down to the bare wood.
Alex commented that the paint came off really easily on this side of the house, compared to the north and east sides. We're thinking it may have had something to do with how the sun always beats down on this side of the house.

Ready for primer.

Now that the south side was completely scraped and prepped, Karstin and Alex could put some primer on. They decided that some of the primer would be tinted gray, so the darker colors of paint wouldn't need two coats.

Primer's all done. Now to get some color on there.

Check back for updates when the paint gets applied!


September 4, 2015

Carport Conundrum: The Deck

After the old rubber roof was removed from the house, we were able to get the new one put on. It took the better part of a morning, but it sure turned out great.

The floor joists are in place, ready for the cedar deck boards.

The gorgeous cedar boards are ready to be put up on the deck.

The finished product!

We are looking forward to putting our patio table and chairs up here once we get our railings installed.

October 3, 2014

That's Jacked Up

A corner of our kitchen was added after the house was built. The odd thing was that it was a floating corner, and there was no support underneath it. Fast forward fifty years, and now we have a sagging problem.

Look to the right of the scaffolding. See the downward slope?

There's nothing holding this corner up!

This is also the same corner that once had a leaky ceiling. Perhaps this addition wasn't carefully planned out and properly built?

In order to fix this problem, the corner would have to be jacked up from the outside... a quarter of an inch at a time. To prevent our windows from being cracked, they took them out and temporarily filled them in with plywood.

It's working!

The jack is doing its job. That's Curt doing his job. 

We were without windows for a while.

The corner is now where it belongs. The deck has been added, too.


Now that the windows are back in, it's a sign that this project is moving along!

September 26, 2014

Carport Conundrum: Electrical

When we bought our home, we had fun figuring out what all the light switches did. We had one that we were sure powered the light fixture under the carport. When we flicked the switch, however, nothing happened. Either 1) the bulb was dead, or 2) the switch wasn't for that light fixture.

After getting started on our restoration of the porch on the south side of our home, we knew we'd want to know that this fixture had a switch. Tyler got on a ladder and swapped out the bulbs. Sure enough, it worked! The only thing was that the wiring for this fixture ran along the outside of the house. It didn't look that great.

This conduit looks awful! Good thing we won't need it anymore.


While this was all going to be opened up, we wanted to have the wiring come through the wall, so we could get rid of the conduit.

The hole in the ceiling is just waiting for the new light fixture.

Watch for an update after we install the new light fixture!


September 22, 2014

Carport Conundrum: The Roof

While we were working on getting the carport columns redone, we wanted to redo the deck as well.

Originally the surface was an asphalt roof that had far exceeded its life. It was sloped so the water would run off the north and south sides and into rain gutters. The surface was also pretty cracked, and we were sure that water was getting inside. The wrought iron railings were also in bad shape and would never hold if someone leaned against them.

A photo taken from last year, long before we started any construction
on this side of the house.


The railings have been removed, as have the gutters and other pieces of trim.

The black rubber roof has been removed, and you can see the water damage.

New wood has been added to support the new rubber roof being put on.

The new roof is coming along!

Just about done!

The new roof is sloped so that rainwater will run off the west side only, and it will drip directly onto the grass below. We should no longer have a need for gutters on the carport. This is great news! No gutters to clean or maintain. The more low maintenance things we have with this house, the better.


July 31, 2014

Porch Foundation

Now that our south porch has been removed, it's time to start the rebuilding process. The first thing that needs to be done is to have a solid foundation on which to build the new porch. Just like when we had our front porch renovated, we'd need to have concrete footings under the stone columns.

Here comes Earl!

Digging the holes for the concrete pilings under our stone pillars.

Putting the forms together.


With the help of Earl from Earl's Excavating and Eric from Roffers Concrete Construction, we are ready for the next phase in our porch rebuild.

The form is ready for concrete.

The truck is here!

One wheelbarrow full at a time, the forms get filled up with concrete.

Jacob the Foreman watching to make sure the job's done right.


July 25, 2014

Porch Demo

The porch on the south side of our home has been in need of serious repairs since long before we moved in. After having Pat Drury of Drury Designs take a look, he confirmed what we'd been fearing all along: we'd have to do a complete demo and rebuild.

The old porch after demo had begun.
The sagging gutter and the beadboard underneath has been removed.


The square pillars will be replaced with round ones, to match the front porch.
The square ones will be reused in a unique way...

We weren't that brokenhearted about it, simply because it was in bad enough shape that it likely would have cost more money to repair it than it would have to start over. Furthermore, the porch wasn't original to the house, so we saw this as an opportunity to match our newly completed front porch.

We attempted to get historic preservation tax credits through the Wisconsin Historical Society for the repairs to this porch -- and the other large projects this year, however, they did not approve our application.  Since the porch was added to the house during the "historical period of significance" the WHS mandated that it must be restored to the style it was when we purchased the house, instead of the historically accurate design that Pat drew up for us.  It is a shame that the state is so rigid in their views because this new porch will fit the design of the house better and not look like it was added as an afterthought.

Removing the old metal roof. 

The porch is gone!

This area is going to be seeing a lot of activity in the next few weeks...


We will keep you updated on the reconstruction as it happens!

July 15, 2014

Front Porch Recap

Since we never recapped all the work that was completed on the front porch, here is a short post that sums it all up.  Age, water damage and dry rot had caught up with the porch and it was in dire need of attention.  Pat Drury and his team did a spectacular job of restoring back to its grandeur.

The restored porch after all of last year's projects.
The leaning porch columns were taken down, new footings were poured, and the block was restacked as they were originally.  Weak areas of the porch were reinforced from underneath and rotted wood along the top and bottom edges was replaced as needed.  The metal roof was removed and replaced with a dimensional shingle that more closely resembles the slate on the turret.  Lastly the broken steps were removed and new concrete steps were poured.  This was quite a summer project -- now on to the next one!


November 16, 2013

The Perch of the Porch

In addition to all of the structural work that has been completed on our porch, another part of this summer's restoration was directed at the porch roof.  For years the porch roof was metal sealed with aluminum paint.  Over time this roof had seen its fair share of wear and tear, and time had taken its toll on the metal roof.  It had been patched and repaired a few times over the years, but it was now in need of replacement.

The hideous metal roof could be seen plainly from space. 
One feature of the old metal roof was a ridge that traveled along its distance, near the edge.  The purpose of the ridge was to collect the rainwater and divert it to one of three holes in the roof that fed normal downspouts.  This probably worked well for years, but through aging, the ridge had weak spots where water was seeping through and damaging the wooden structure underneath.

The old metal roof being removed.
One of the pieces of the ridge was actually marked with the date it was installed.  Pat from Drury Designs snapped a picture and saved the board for us to keep.  It is a pretty neat piece of history from our home.

Rolling out the tar paper and placing the bundles of shingles.
Instead of installing a new metal roof, we opted to have shingles installed.  This way it would more closely match the existing roof on the main part of the house.  Since a portion of the porch roof wraps around the turret, conventional shingles were not a good fit.  With Pat's advice, we choose a line of shingles that provided a more textured look and would allow the roofer to cut the shingles to lay properly along the roof's radius.

Roofing begins.
Since the main part of our roof was already dark shingles, we chose a color that would blend well. When it comes time to repair the main roof we will use the same shingles.  The new porch roof looks amazing, and the eye-sore of the metal roof is like a long lost memory.

After the new roof has been completed.

September 11, 2013

Pillar Repair

When we first walked through our home, one of the things that we noticed was that one of the stone pillars on our porch was leaning. We knew we'd have to get it repaired someday, but that day came very recently!


This is what we have had to look at since we bought our house!
The stone pillar in the background of the picture was not exactly vertical either,
so it needed to be repaired as well.


Pat Drury of Drury Designs was brought on board to help coordinate the repairs we'd need to make to our 111-year-old porch. In addition to the leaning pillar, we also had some problems with the porch roof leaking, but that will be covered in a future blog post. We will also have more lighting installed along the entire length of the porch. We are really looking forward to that!

The first thing that had to happen was that our mason, Aaron from Vanden Avond Masonry, had to take the pillars apart layer by layer. Then, Eric from Roffers Concrete Construction had to come and dig out the old footings. He had to go four feet down! After that, he had to pour new footings for the repaired pillars. The final step was for Aaron to reassemble the pillars.

The disassembled pillars.

Eric removing concrete debris.

The excavating begins!

Four feet down.
The first part of the footings have been poured.

The rest of the footing has been poured.
The forms around the outside had to stay on for several days.
This is all that you can see of the footings - the rest of it is buried under four feet of topsoil.

Now that the pillars have been reassembled, we are so glad that we can cross off another thing on our list of renovations.


The stone pillars have been put back together... and they aren't leaning!
The mason did a nice job of making the mortar look aged, so these repaired pieces don't stand out
compared to those that didn't need repairs.