October 26, 2012

A New Coat of Paint: The 2nd Floor Bathroom

I'm someone who usually takes a while to make a decision, especially when I know if I rush into it, I could end up having made the wrong decision.  Meaning, I'm not that impulsive.  Except in this case.

The bathroom on the 2nd floor of our house is designed and decorated in a classic turn-of-the-century style: contrasting colors, pedestal sink, basket-weave mosaic tile floor, and square tile on the walls.  The tile doesn't go all the way up to the 10-foot ceiling, but rather stops at the 6-foot mark. According to my math, this leaves four feet of wall that needs to be painted.

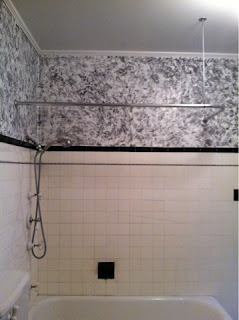
The previous owner took the black and white theme of the bathroom and went on a straight-out-of-the 1980s rag painting rampage. As such, we decided that painting over the splotchy black paint was going to be one of our first painting projects.


Yikes.

We had a paint sample booklet that featured historic paint colors, and we were between a blue and a green. This is where my impulse kicked in. We decided to get Buxton Blue. It matches a teeny, tiny stripe on our bath towels. Good enough for me!


After the painting was completed.


We got our paint for the kitchen, my sewing room, and this bathroom at Parker Paint in Green Bay.  The guy behind the counter was very helpful, and it didn't hurt that I had a BUY ONE GET ONE FREE COUPON. We ended up getting six gallons of paint for the cost of three.  (If you know me, then you know how much I love a good deal.)

Making an impulsive decision on choosing this paint color could have been disastrous, but it ended up working... this time!

October 20, 2012

Laundry Room - Part II: Pipes and Wires

If you read our last post "Laundry Room - Part I: The Wall Comes Tumblin' Down", you know that we have been focusing our efforts on finally having the ability to use our washer and dryer in our own house.  For this task, we need to convert the former maid's staircase into a useable room with all the hookups for modern appliances.

The small hole I cut into the drywall revealed water supply pipes and a drain pipe for the bathroom sink opposite this side of the wall.  I was hopeful that the experienced plumbers at Sinclair Plumbing would be able add the washer hookups and drain with relative ease.

While the supply pipes were easily cut and accessed, it was the drain that created more of a challenge.  The drain pipe I originally spied through the small hole was not large enough to handle the flow from a washer and was too high in the wall to drain properly.  Luckily there was a larger sewer drain just to the left that services the third floor bathroom.

Plumbing for the washer.

Cutting through this cast iron pipe was no easy task for the plumber, plus there were some electrical wires hiding behind the drain pipe.  Fortunately, our plumber was experienced with working in older homes and knew to look for these wires before he began cutting the pipe.

Now that a potential electrical problem was avoided, it was time to add the new electrical connections that we would need for both the washer and dryer.  We again enlisted Harv's Electric to complete their third project in our house.  The electrician from Harv's made short work of adding the new outlets around the plumbing.  He even moved a light fixture and added a switch and outlet combo in our future laundry room.

The new electrical outlets

Now that the pipes and wires have been completed, the next steps will be attending to the floors and walls.